Introduction to Ledger.com/start
In the world of cryptocurrencies, security is paramount. As digital currencies grow in popularity, so do the risks associated with storing and managing them. While online exchanges and wallets provide a level of convenience, they may not offer the same level of protection as hardware wallets. Ledger is a company that has become synonymous with cryptocurrency security, and their products are designed to help individuals safely store and manage their digital assets.
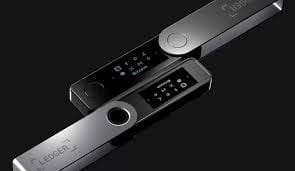
Ledger's hardware wallets, such as the Ledger Nano S and Ledger Nano X, are among the most widely used solutions for keeping cryptocurrencies secure. One key aspect of getting started with these devices is understanding how to properly set them up. This is where Ledger.com/start comes into play. In this article, we will explore how to set up your Ledger hardware wallet, what to expect during the process, and why this is an essential step in securing your crypto assets.
What is Ledger.com/start?
Ledger.com/start is the official website where users can begin the process of setting up their Ledger hardware wallet. It provides a step-by-step guide to help users activate their device, secure their recovery phrase, and begin using their wallet to store cryptocurrencies like Bitcoin, Ethereum, and many others.
When you first receive your Ledger device, it will not be ready to use. It requires activation, which includes downloading the necessary software, generating a recovery phrase, and performing other security-related tasks. The Ledger website offers all the information and tools you need to start this process securely.
Types of Ledger Devices
Before diving into the setup process, it’s important to understand the different types of Ledger hardware wallets available:
Ledger Nano S
The Ledger Nano S is the original model in the Ledger series. It is a compact and affordable device that provides robust security for cryptocurrency storage. While it offers fewer features than the more advanced models, it is still an excellent option for those who are just getting started in the world of crypto.
Ledger Nano X
The Ledger Nano X is a more advanced model that offers additional features, including Bluetooth connectivity, a larger screen, and the ability to store more cryptocurrencies simultaneously. This device is ideal for users who want a more comprehensive solution and prefer the convenience of managing their assets on the go.
Both devices are supported by the Ledger Live app, which is the companion software that allows you to manage your crypto assets and interact with various blockchain networks.
Step-by-Step Guide to Setting Up Your Ledger Wallet
Now that you know the types of devices available, let's go through the steps involved in setting up your Ledger hardware wallet via Ledger.com/start.
Step 1: Visit Ledger.com/start
The first thing you need to do is visit the Ledger.com/start website. This is the central hub for all Ledger wallet setup guides. Once you’re on the website, you will see a series of prompts guiding you through the setup process. The page will direct you to either download the Ledger Live app for your computer or mobile device. This app is necessary to interact with your Ledger wallet.
Step 2: Install Ledger Live
Ledger Live is the software that acts as the bridge between your hardware wallet and the cryptocurrency networks. After downloading and installing Ledger Live, you’ll be prompted to connect your Ledger wallet via USB or Bluetooth, depending on which model you are using.
Ledger Live supports both desktop and mobile devices, making it easy to manage your crypto portfolio from a variety of devices. Once installed, open the app and select the option to set up a new device.
Step 3: Initialize Your Ledger Device
After connecting your Ledger wallet to your computer or mobile device, the Ledger Live app will guide you through the initialization process. During this step, your device will ask you to choose a PIN code. This PIN code is a crucial element of the security process, as it ensures that only you can access your device.
Make sure to choose a PIN that is unique and difficult for others to guess. You will be asked to confirm the PIN code multiple times for added security.
Step 4: Generate and Secure Your Recovery Phrase
One of the most important aspects of setting up your Ledger wallet is securing your recovery phrase. This phrase consists of 24 words that act as a backup in case your Ledger device is lost, stolen, or damaged.
The recovery phrase is the key to restoring your wallet if needed, so it is essential that you write it down on paper and store it in a safe place. Do not save this phrase digitally or share it with anyone, as anyone who has access to it can control your funds.
During the setup process, Ledger Live will display the recovery phrase one word at a time. Write down each word carefully in the correct order. Afterward, you will be asked to verify that you have written down the recovery phrase correctly.
Step 5: Install Apps and Add Accounts
Once your Ledger device is initialized and your recovery phrase is secured, you can begin installing apps for the cryptocurrencies you wish to store. Ledger Live supports a variety of crypto apps for different blockchains, such as Bitcoin, Ethereum, and even newer altcoins.
To install an app, simply select the relevant option within the Ledger Live interface. Once the app is installed, you can add accounts to your wallet and start receiving or sending cryptocurrency.
Important Security Considerations
While setting up your Ledger device is a straightforward process, there are a few critical security considerations to keep in mind:
- Do Not Share Your Recovery Phrase: Your recovery phrase is the most important piece of information when it comes to securing your crypto. If anyone gains access to your recovery phrase, they can access your funds. Never share it with anyone, not even Ledger support.
- Use a Strong PIN: Choose a strong PIN code for your Ledger device to prevent unauthorized access. A PIN code should be a random sequence of numbers, and it should not be easy to guess.
- Back Up Your Recovery Phrase: Make sure to store your recovery phrase in multiple secure locations. If your device is lost or damaged, the recovery phrase will be the only way to recover your assets.
- Only Use Official Ledger Software: Always download Ledger Live from the official Ledger website. Avoid using third-party software that may not be secure.
Why Use a Ledger Wallet?
The primary reason to use a Ledger wallet is security. By using a hardware wallet, your private keys are stored offline, away from potential online threats like hacking or malware. This makes Ledger devices one of the safest ways to store cryptocurrencies.
Unlike software wallets that are connected to the internet, Ledger devices are cold wallets, which means they are not susceptible to online attacks. Even if your computer or mobile device is compromised, your crypto assets remain safe on the hardware wallet.
Conclusion
Setting up a Ledger hardware wallet through Ledger.com/start is a straightforward and essential process for anyone serious about cryptocurrency security. By following the step-by-step guide provided by Ledger, you can ensure that your digital assets are stored safely and securely. With the rise of cyber threats and the growing importance of privacy, investing in a Ledger device is a smart move for anyone looking to protect their cryptocurrency holdings.