Ledger.com/start: A Comprehensive Guide to Setting Up Your Ledger Device
In today’s world, cryptocurrency has emerged as a revolutionary financial asset, providing individuals with new opportunities to invest and manage their wealth. However, with this opportunity comes the need for security. One of the most popular ways to protect your cryptocurrency is through the use of hardware wallets, and among the leaders in this field is Ledger. If you are new to the world of cryptocurrency or have just purchased a Ledger hardware wallet, you may be wondering where to begin. The Ledger.com/start page is the essential starting point to guide you through the setup process. This guide will break down everything you need to know to get your Ledger device up and running.
What Is Ledger?
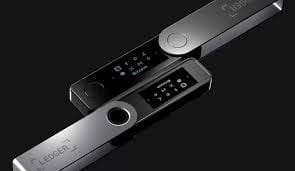
Ledger is a French company founded in 2014 that specializes in providing secure hardware wallets for managing cryptocurrencies. A hardware wallet is a physical device designed to store private keys offline, significantly reducing the risk of hacking or online theft. Ledger devices, such as the Ledger Nano S and Ledger Nano X, are among the most trusted in the industry, offering users a way to securely store a wide range of cryptocurrencies, including Bitcoin, Ethereum, and many others.
Why Use a Ledger Hardware Wallet?
Before diving into the setup process, it's essential to understand why you would need a hardware wallet in the first place. While software wallets and exchanges may offer convenience, they are inherently vulnerable to cyber threats. Your private keys, which are necessary to access and manage your cryptocurrencies, are typically stored online or in the cloud, making them a prime target for hackers.
A hardware wallet, on the other hand, keeps your private keys offline, significantly enhancing security. Ledger devices are equipped with a secure chip that ensures your keys are not exposed to potential online risks. By using a Ledger device, you maintain full control over your cryptocurrency and can rest assured that it is protected from online threats.
Step 1: Getting Started with Ledger
To begin the setup process, navigate to the official Ledger.com/start page. This page will guide you through the entire process of configuring your Ledger hardware wallet, from unboxing the device to completing the setup and securing your wallet.
Unbox Your Ledger Device
When you first receive your Ledger device, make sure it comes in its original, sealed packaging. This ensures that the device has not been tampered with during transit. Inside the box, you will find the Ledger hardware wallet itself, a USB cable, a recovery sheet, and a keychain for storing your device.
Important: The recovery sheet contains your recovery phrase, which is a crucial part of your wallet setup. Keep this sheet in a safe place, as it will allow you to recover your funds in case the device is lost or damaged. Never share your recovery phrase with anyone.
Step 2: Installing Ledger Live
Ledger Live is the companion app designed to work with your Ledger hardware wallet. It’s available for Windows, macOS, Linux, and mobile devices. You’ll need this app to manage your cryptocurrencies, check your balance, and install various applications for different coins.
Download and Install Ledger Live
Head over to Ledger.com/start and download the Ledger Live application. Follow the installation instructions specific to your operating system. Once installed, open the app, and you will be prompted to either set up a new device or restore a previous one. Since this is your first time setting up the Ledger device, select the option to "Set up a new device."
Step 3: Initializing Your Ledger Device
After installing Ledger Live, it’s time to initialize your device. Follow these steps to get started:
- Turn on Your Device: Connect your Ledger hardware wallet to your computer or mobile device using the included USB cable. The screen should light up with the Ledger logo.
- Select Your Language: Use the buttons on the device to navigate through the options and select your preferred language.
- Create a PIN: The next step is to create a PIN to protect your device. Choose a 4- to 8-digit PIN, ensuring it is something you can remember but difficult for others to guess. This PIN will be required whenever you access the device.
Step 4: Writing Down Your Recovery Phrase
The most critical part of the setup process is backing up your recovery phrase. This phrase consists of 24 words, which are used to restore access to your wallet if your device is lost, stolen, or damaged.
- Write Down the Recovery Phrase: You will be shown a 24-word recovery phrase on the Ledger device. Write each word down in the order they appear on the recovery sheet provided in the box. It’s vital to store this recovery phrase in a safe location, away from anyone who might try to access your funds.
- Confirm the Recovery Phrase: After writing it down, you will be asked to confirm the recovery phrase by selecting the words in the correct order. This is a security step to ensure that you’ve written the phrase correctly.
Note: Never store your recovery phrase digitally or online. The only safe way to store it is offline, such as in a safe or locked drawer.
Step 5: Setting Up Ledger Live with Your Device
Once your device is initialized, you’ll return to the Ledger Live app on your computer or mobile device.
- Pairing Your Device: Follow the on-screen instructions in Ledger Live to pair your device with the app. This typically involves selecting the correct device model and confirming the connection on the device itself.
- Install Apps for Cryptocurrencies: Now that your device is set up, you can install apps for the cryptocurrencies you wish to manage. Ledger Live provides an easy way to install apps for various assets like Bitcoin, Ethereum, and others. Simply go to the "Manager" section of Ledger Live, select the app you want to install, and follow the prompts.
Step 6: Sending and Receiving Cryptocurrencies
With your Ledger device set up and apps installed, you can begin sending and receiving cryptocurrencies. To receive funds, simply go to the "Receive" tab in Ledger Live, select the cryptocurrency you wish to receive, and display the address on your Ledger device.
To send funds, you will need to use the "Send" tab, enter the recipient’s address, and confirm the transaction on your Ledger device.
Conclusion: Enjoy Peace of Mind with Your Ledger Wallet
Setting up a Ledger hardware wallet is an essential step in securing your cryptocurrency holdings. By following the steps outlined on the Ledger.com/start page, you can confidently protect your assets from online threats. Remember, always keep your recovery phrase safe and never share it with anyone. With your Ledger device properly set up, you can rest assured that your crypto investments are secure and under your control.