THE PURPOSE AND PROCESS OF Trezor.io/start
Introduction – What Is Trezor.io/start?
Trezor.io/start serves as the official and authorized setup portal provided by SatoshiLabs for beginning the configuration and onboarding of a Trezor hardware wallet. This site is not a login page or cloud‑based interface where your keys or funds are stored; rather, it is a guided starting point that initiates the essential steps needed to securely prepare and activate your device. Visiting this URL ensures that you are following verified instructions and downloading the correct software instead of relying on misleading or malicious third‑party sites that pose significant risks to your cryptocurrency assets. (io-strt-trezar.framer.media)
Section One – Why Use Trezor.io/start?
Official Onboarding:
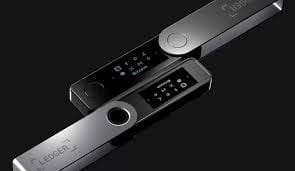
Whenever a new Trezor hardware wallet is unpacked—whether it is a Trezor Model One, Model T, or newer design—the first recommended action is to open a browser and navigate directly to Trezor.io/start. This page acts as your first step toward safely initializing the hardware wallet in a manner that follows best practices for cryptocurrency custody. It provides verified setup instructions, direct download links, and security guidance, making it the only recommended starting location for setup. (io-strt-trezar.framer.media)
Security Against Phishing:
One of the primary risks facing crypto users is phishing—the act of directing users to fake sites designed to capture private keys, recovery phrases, or passwords. Hardware wallet phishing attacks often mimic official brands, including Trezor, in an attempt to deceive users. By typing the address manually or scanning a QR code printed on the wallet’s packaging, users dramatically reduce the risk of navigating to a fraudulent site. The HTTPS indicator and accurate domain spelling are essential elements to check before proceeding.
Section Two – Preparing to Visit Trezor.io/start
Before accessing the setup page, you should have the following on hand:
- The unopened and genuine Trezor hardware wallet.
- A compatible computer or mobile device with a USB port.
- The USB cable included with the device.
- Stable internet access.
- A quiet, private environment where you can focus on setup and securely record sensitive information. (helpstarted)
Inspect the packaging carefully to be sure the seals appear undisturbed. While modern Trezor packaging may not use elaborate anti‑tamper stickers, checking that nothing looks unusual or damaged is a good first step toward ensuring hardware integrity before beginning setup. (helpstarted)
Section Three – Step‑by‑Step Setup Flow
Once you arrive at Trezor.io/start, the process unfolds as a sequence of clearly articulated steps:
Step 1: Select Your Device Model.
Choose whether you are using a Trezor Model One, a Trezor Model T, or another supported unit. Models may have slightly different setup flows due to features like touchscreens or additional cryptographic backup options. (help-trezo-starts.typedream.app)
Step 2: Install Official Software.
Trezor.io/start links directly to the download page for Trezor Suite, the official application that allows you to communicate with your hardware wallet securely. Trezor Suite is available as both a desktop application for Windows, macOS, and Linux, and a web‑based version that can operate inside a supported browser. Installing the official suite or launching the web app is a necessary step before your device can be initialized. (help-trezr-io-eng.pages.dev)
Step 3: Update Firmware (If Required).
When you connect your Trezor device, the software will check whether the firmware—the internal software that runs on the device—is current. Brand‑new devices typically either have no firmware pre‑installed or require updating to the latest secure version. The firmware is cryptographically signed to attest to its legitimacy. Never proceed with firmware updates from sources outside the official setup flow. (helpstarted)
Step 4: Create a New Wallet.
After the firmware update, you will be prompted to either create a new wallet or recover an existing one. For new users, choosing Create Wallet allows the hardware to generate cryptographic key pairs internally. These keys are the foundation of ownership and never leave the hardware device, significantly reducing exposure to vulnerabilities on your computer or internet. (starthubio)
Step 5: Record Your Recovery Seed.
The device will present a sequence of words, often 12, 18, or 24 in length, known as your recovery seed. This seed is the only backup to your wallet. It must be written down manually on the provided recovery card or a secure offline medium. Users are strongly cautioned against photographing, typing, or storing these words digitally or online in any form. If the seed is lost or compromised, access to your funds could be lost permanently—or stolen if the seed is discovered by bad actors. (io-strt-trezar.framer.media)
Step 6: Set a PIN Code.
Once you have recorded and confirmed your seed, the next protective layer is choosing a PIN. This PIN will be required every time the device is connected and is intended to protect against unauthorized physical use. Poorly chosen or simple PINs are discouraged; instead, opt for a combination that is difficult for someone else to guess. The device locks access when incorrect attempts accumulate, and it may even trigger a wipe after repeated wrong entries to safeguard the stored assets. (io-strt-trezar.framer.media)
Section Four – After Setup Is Complete
Once the setup flow completes, your wallet is ready to manage digital assets. With the hardware and software connected, you can:
- Send or receive cryptocurrency.
- View transaction history and portfolio balances.
- Add accounts for supported assets like Bitcoin, Ethereum, Cardano, and others supported by Trezor Suite. (starthubio)
However, ongoing security still requires awareness. Always verify transaction details directly on the hardware device before approving them in the software interface. Never plug in your device unless you intend to interact with it, and ensure firmware and software remain updated through the official channels. (io-strt-trezar.framer.media)
Conclusion – The Importance of Trezor.io/start
In summary, Trezor.io/start functions as the official launch pad for initializing and securing a Trezor hardware wallet. It provides every necessary step from downloading official tools to safeguarding your recovery seed and setting protective codes. By starting here, you follow the intended secure flow and reduce exposure to phishing, malware, and unauthorized access. Using this portal is integral to maintaining ownership control over your digital assets while embracing the robust security that hardware wallets are designed to provide. (homepage-1.ghost.io)