Introduction to Ledger: A Secure Path to Cryptocurrency Management
In the fast-evolving world of cryptocurrencies, security is paramount. While digital currencies like Bitcoin and Ethereum promise decentralization and freedom, they also bring significant risks in terms of security. One of the best ways to secure your crypto assets is through a hardware wallet, and Ledger has established itself as one of the leaders in this domain. If you’re new to Ledger or considering using their products, the Ledger.com/start page is your entry point into a more secure and private way of managing your digital assets.
What is Ledger?
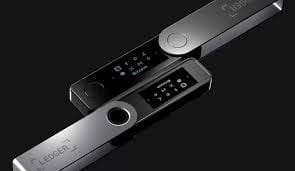
Ledger is a company that specializes in hardware wallets designed to store cryptocurrencies securely offline. Unlike traditional online wallets, which are vulnerable to hacking, Ledger hardware wallets ensure your private keys are kept offline, away from potential attackers. The company’s devices, like the Ledger Nano S and Ledger Nano X, have gained a reputation for offering cutting-edge security features without compromising usability.
The Importance of Hardware Wallets
Hardware wallets are considered one of the most secure ways to store cryptocurrencies. Here’s why:
- Offline Storage: Private keys are stored offline, making them less susceptible to hacks or phishing attempts.
- Full Control: You maintain full control over your private keys and assets. Your cryptocurrency isn’t stored with an exchange, reducing the risk of losing funds in the event of an exchange failure.
- Multicurrency Support: Ledger supports a wide range of cryptocurrencies, allowing you to manage multiple assets in one secure place.
For anyone serious about managing their digital assets securely, Ledger offers a trusted solution.
Getting Started with Ledger: Visiting Ledger.com/start
The first step toward securing your cryptocurrency is navigating to Ledger.com/start. This webpage is designed to provide a step-by-step guide for setting up your Ledger hardware wallet, whether you are using the Ledger Nano S, Ledger Nano X, or Ledger Stax.
Step 1: Buy Your Ledger Hardware Wallet
Before you can start the setup process, you need to purchase a Ledger device. It's recommended to buy directly from the official Ledger website or an authorized retailer to ensure the device's authenticity. Counterfeit hardware wallets can be tampered with, putting your assets at risk. Once you have your Ledger device, you’re ready to begin the setup process.
Step 2: Connect the Device to Your Computer or Mobile Phone
After purchasing your Ledger wallet, the next step is to connect it to your device. Depending on the model, you may use a USB cable (for Ledger Nano S and X) or Bluetooth (for the Ledger Nano X). Once connected, you’ll need to install the Ledger Live software, which is available for both desktop and mobile devices.
Ledger Live is the companion app for your Ledger wallet. It allows you to manage your cryptocurrency portfolio, check your balance, and even send or receive transactions—all while keeping your private keys safe. It’s essential to download Ledger Live from an official source to avoid any malware or phishing risks.
Step 3: Initialize the Ledger Wallet
Once you have Ledger Live installed, follow the on-screen instructions to initialize your Ledger device. This involves creating a PIN code that will be required every time you access your wallet. It’s crucial to choose a PIN that is both secure and memorable.
After setting the PIN, you’ll be prompted to generate a recovery phrase. This phrase consists of 24 words that serve as the backup for your private keys. In case your device is lost, stolen, or damaged, you can use the recovery phrase to restore your wallet and access your assets.
Step 4: Write Down Your Recovery Phrase
One of the most critical aspects of using a Ledger wallet is the recovery phrase. Ledger will display the 24 words on the screen, and it is your responsibility to write them down and store them in a safe place. Never store your recovery phrase online or in a digital format, as that would expose you to the risk of cyberattacks.
Some people use fireproof safes or encrypted storage devices to secure their recovery phrase. Others use multiple paper copies stored in different locations to ensure redundancy. Whatever method you choose, ensure that only you have access to the recovery phrase.
Step 5: Add Cryptocurrency Accounts
After your wallet is initialized, you can start adding cryptocurrency accounts to manage. You can use Ledger Live to install apps for various cryptocurrencies. Some of the most popular coins supported by Ledger include Bitcoin (BTC), Ethereum (ETH), XRP, and Litecoin (LTC). Depending on the coins you own, you may need to install multiple apps to manage different types of assets.
To install an app, simply open Ledger Live, select the “Manager” tab, and choose the cryptocurrency you wish to add. Once installed, you can access the respective accounts and begin transferring, sending, and receiving coins.
Step 6: Transacting with Your Ledger Wallet
With your wallet set up and accounts installed, you're ready to begin transacting. Sending and receiving cryptocurrency with a Ledger wallet is easy:
- Sending Crypto: To send cryptocurrency, select the coin in Ledger Live, input the recipient’s address, specify the amount, and confirm the transaction. You’ll need to approve the transaction on the Ledger device itself, which adds an extra layer of security.
- Receiving Crypto: To receive cryptocurrency, generate your public address through Ledger Live and share it with the sender. Always double-check the address before sending to avoid potential mistakes.
One of the unique features of Ledger’s devices is that they keep your private keys on the hardware device, meaning they are never exposed online. This ensures that even if your computer or phone is compromised, your assets remain safe.
Step 7: Regularly Backup and Update Your Wallet
Security is an ongoing process. It's essential to regularly back up your recovery phrase and update your Ledger Live app to ensure it’s up-to-date with the latest security patches. Ledger frequently releases software updates to improve security features and add support for new cryptocurrencies, so it's a good idea to check for updates regularly.
Security Tips for Using Ledger Wallets
While Ledger devices are incredibly secure, there are a few best practices you should follow to maximize your protection:
- Use a Strong PIN: Avoid using easily guessable PINs (like “1234” or “0000”). Choose a PIN with a mix of numbers that’s difficult for others to guess.
- Enable Two-Factor Authentication: While the Ledger device itself doesn’t support 2FA, enabling it on your exchanges and other related accounts can add another layer of protection.
- Avoid Public Wi-Fi: When sending or receiving cryptocurrency, always use a secure, private internet connection. Public Wi-Fi networks are more susceptible to attacks.
- Keep Your Device Safe: Always keep your Ledger hardware wallet in a safe and secure place, such as a locked drawer or a secure wallet.
Conclusion
Using a Ledger hardware wallet is one of the most secure ways to store and manage your cryptocurrency. By visiting Ledger.com/start, you can follow a simple, clear process to set up your device and protect your digital assets. From purchasing the wallet to generating recovery phrases and adding cryptocurrency accounts, Ledger ensures that the process is as straightforward as possible while maintaining the highest levels of security.
As cryptocurrencies become more widely adopted, safeguarding your assets is more important than ever. With a Ledger wallet, you can have peace of mind knowing your private keys are securely stored offline, providing an extra layer of protection in a world full of digital threats.