Introduction to Trezor.io/start
Trezor.io/start is the official website for setting up a Trezor hardware wallet. The site guides users through the essential process of initializing and configuring their Trezor device for secure cryptocurrency storage. Whether you're new to cryptocurrency or a seasoned user, the Trezor wallet provides a reliable method for protecting digital assets, and the website is a crucial first step for setting up the device.
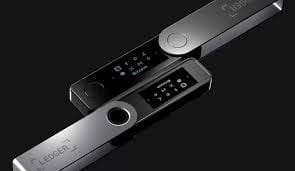
What is a Trezor Hardware Wallet?
Trezor is one of the most popular and trusted hardware wallets in the cryptocurrency space. A hardware wallet is a physical device that stores cryptocurrency private keys offline, making them less vulnerable to hacking or online threats. Trezor is specifically known for its user-friendly design, security features, and wide compatibility with various cryptocurrencies.
By using a Trezor wallet, users can store private keys offline, which are necessary for accessing and transacting digital assets like Bitcoin, Ethereum, and others. When you set up your wallet through Trezor.io/start, you’ll begin the process of creating secure backups and ensuring your private keys are protected.
Getting Started with Trezor: Step-by-Step Process
Step 1: Visit Trezor.io/start
To begin your setup, visit Trezor.io/start from your computer or mobile browser. The official website is your starting point for downloading the Trezor software and accessing various helpful tools. It’s important to make sure you are visiting the legitimate Trezor website to avoid phishing scams.
Once on the site, you’ll be prompted to select the specific model of your Trezor wallet. Trezor offers different models, including the Trezor One and Trezor Model T. Both devices provide robust security features, but the Model T offers additional touch-screen functionality, allowing for an enhanced user experience.
Step 2: Download and Install the Trezor Suite
After selecting your model, the next step involves downloading the Trezor Suite software. This software serves as the user interface for managing your wallet. You can download the suite for Windows, Mac, or Linux. The Trezor Suite is essential for initializing your device and performing essential wallet functions like managing coins and reviewing transaction history.
Step 3: Connect Your Trezor Device
With the software installed, plug your Trezor wallet into your computer via USB. Follow the instructions on the screen, which will guide you through the process of connecting the device and establishing a secure connection.
Step 4: Set Up a Pin and Recovery Seed
During the setup process, you'll be asked to choose a PIN to secure your wallet. This PIN is required whenever you access the device, ensuring that even if someone steals your Trezor, they cannot access your funds without the PIN.
Additionally, Trezor will provide you with a recovery seed—a 24-word phrase that acts as a backup for your wallet. Write this phrase down on paper and store it in a safe place. This recovery seed is critical in case your Trezor device is lost or damaged, as it allows you to recover your funds on a new device.
Features of Trezor Hardware Wallet
Security
Trezor wallets provide a variety of security features, including:
- Offline Storage: The private keys are stored offline, which protects them from online hacks and malware.
- PIN Protection: A PIN is required to access the wallet, ensuring only authorized users can access the funds.
- Recovery Seed: The 24-word recovery phrase allows users to recover their funds if their wallet is lost or damaged.
User-Friendliness
Trezor wallets are designed with ease of use in mind. The Trezor.io/start site and the Trezor Suite software simplify the setup process, ensuring that even beginners can get started without hassle. The wallet also supports multiple cryptocurrencies, making it a versatile option for users with various digital assets.
Why Use Trezor for Cryptocurrency Storage?
Using a hardware wallet like Trezor provides several advantages over software wallets or exchanges:
- Enhanced Security: Since your private keys are stored offline, Trezor reduces the risk of online threats like hacking or phishing.
- Full Control Over Assets: With a Trezor wallet, you maintain complete control over your cryptocurrency. No third-party exchanges or wallets have access to your private keys.
- Backup and Recovery Options: The recovery seed ensures you can restore your wallet even if the device is lost or damaged.
Common Issues and Troubleshooting
While Trezor devices are known for their reliability, users may encounter issues during setup. Here are some common problems and solutions:
- Trezor Not Recognized by Computer: Ensure that you are using a compatible USB port and that the Trezor Suite is correctly installed.
- Recovery Seed Lost or Forgotten: Unfortunately, if you lose your recovery seed, your funds may be unrecoverable. Always store your recovery seed in a secure location.
- PIN Issues: If you forget your PIN, Trezor allows you to reset the device by entering the recovery seed. However, this will erase all data on the device.
Conclusion
Setting up a Trezor wallet through Trezor.io/start is a simple yet crucial process for securing your cryptocurrency assets. By following the steps provided on the website, you can ensure that your funds are stored safely and securely. Always remember to back up your recovery seed and use a strong PIN to protect your wallet. Whether you're just beginning your cryptocurrency journey or you're an experienced user, Trezor provides one of the most secure and reliable solutions for managing digital assets.