Introduction to Trezor.io/start
Trezor is one of the leading brands in the world of cryptocurrency hardware wallets. With the increasing need for secure methods to store digital assets like Bitcoin and Ethereum, Trezor offers a reliable solution. By using Trezor’s hardware wallet, you ensure that your private keys remain offline, keeping them safe from potential online threats.
At the core of Trezor's functionality is its web-based interface, accessible through Trezor.io/start. This is the portal where new users set up their Trezor device, create accounts, and access their cryptocurrencies securely. In this article, we will walk through the essential features and the process of getting started with Trezor by exploring Trezor.io/start.
Why Choose Trezor for Crypto Security?
When it comes to securing your cryptocurrency, you cannot afford to be careless. Keeping digital assets on exchanges or software wallets opens the door for cyber-attacks. Hardware wallets, like Trezor, provide an essential layer of protection by storing your private keys offline. By interacting with Trezor.io/start, you can ensure a smooth transition into the world of secure crypto management.
The Trezor.io/start website is the gateway to initializing your Trezor device. Whether you're setting up for the first time or looking to update your settings, this portal is your go-to destination.
What is Trezor Hardware Wallet?
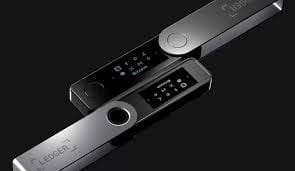
Trezor hardware wallets are physical devices that are designed to store your private keys securely. They operate in a completely offline environment, which means hackers can’t reach your keys through the internet.
Trezor Model One and Trezor Model T are the two main models available on the market. Both offer strong security features, but the Model T includes a touchscreen for more convenient user interaction.
How to Set Up Your Trezor Device Using Trezor.io/start
The setup process for your Trezor device through Trezor.io/start is straightforward and secure. Below is a step-by-step guide on how to begin:
- Unbox Your Trezor Device
- After purchasing your Trezor device, unpack it and make sure everything is intact. You should have the device, a USB cable, and a recovery seed card for backup.
- Connect to Trezor.io/start
- Open a web browser and visit Trezor.io/start. Make sure you're on the official website to avoid phishing scams.
- Download Trezor Suite
- On the Trezor.io/start page, you will be prompted to download Trezor Suite, the application used to manage your wallet. It is available for Windows, macOS, and Linux.
- Install Trezor Suite
- After downloading the installer, follow the prompts to install the software on your computer. Once installed, launch Trezor Suite.
- Connect Your Device
- Plug your Trezor wallet into your computer via the USB cable. You should see a welcome message on the device screen.
- Follow On-Screen Instructions
- Trezor Suite will guide you through the process. This includes setting up a new wallet, creating a PIN code, and backing up your recovery seed.
Creating a Strong Recovery Backup
One of the most critical steps during the Trezor.io/start setup process is to back up your recovery seed. The recovery seed is a 12 to 24-word phrase that allows you to recover your wallet in case your device is lost, stolen, or damaged. Write it down on the provided card and store it in a safe place. Never share this seed with anyone.
Security Features of Trezor
Trezor wallets are designed to offer the highest level of security. Some of the key features include:
- Offline Storage: Trezor devices store private keys offline, making them immune to online hacking attempts.
- PIN Code: A PIN code is required to unlock your device, adding an extra layer of security.
- Two-Factor Authentication: Trezor supports 2FA to prevent unauthorized access.
- Passphrase Protection: You can set an additional passphrase to further protect your funds.
Managing Multiple Cryptocurrencies
Through Trezor.io/start, users can manage a wide range of cryptocurrencies. Trezor supports popular digital assets like Bitcoin, Ethereum, Litecoin, and many more. Trezor Suite allows you to send, receive, and manage your coins and tokens all in one place.
If you want to add more cryptocurrencies to your wallet, simply go to the "Add Account" option in Trezor Suite and follow the prompts. You can manage multiple wallets for different coins and track your balances from the same device.
Updating Your Trezor Device
To ensure you’re always using the latest security features and improvements, it’s important to keep your Trezor device up to date. Updates can be easily done through Trezor.io/start:
- Connect the Trezor Device to the Computer.
- Open Trezor Suite.
- Check for Updates: Trezor Suite will notify you if a new firmware update is available.
- Follow Instructions: The update process is straightforward. Simply follow the on-screen instructions to update your device.
Troubleshooting Common Issues
While setting up or using your Trezor device, you might encounter a few common issues. Here are some troubleshooting tips:
- Device Not Recognized: Make sure you’re using a compatible USB cable and port. Try connecting the device to a different USB port.
- Lost Recovery Seed: If you lose your recovery seed, you may not be able to recover your wallet. Always store it in a safe location.
- Firmware Update Fails: If the update fails, check the Trezor support site for more advanced troubleshooting steps.
Conclusion
In summary, Trezor.io/start is the gateway to a secure, offline cryptocurrency management experience. By setting up your Trezor device through this portal, you ensure that your assets are kept safe from hackers and cyber threats. Whether you're a seasoned crypto investor or a beginner, the security features and user-friendly interface make Trezor a top choice for protecting your funds.
Make sure to follow the setup instructions carefully and never share your recovery seed. Once set up, you'll be ready to enjoy the peace of mind that comes with knowing your cryptocurrency is securely stored.